Sharing Data with CatalystNeuro
Thank you for sharing your data with the CatalystNeuro team!
Here are some step-by-step instructions for how to utilize Globus to upload your data to our size-unrestricted Google Drive folder.
Step 1: Download Globus Personal Endpoint
If your institution or lab already has a non-personal endpoint on which you have transfer permissions, you can skip this step and go to Step 2. Otherwise…
- Go to globus.org/globus-connect-personal and download+install your platform-specific version.
- When it is installed, go ahead and launch it to activate the endpoint.
Step 2: Setup Transfer Destination
- Start by going to globus.org and creating an account. If you already have an account, go to the next step.
- Send your account name to Ben at ben.dichter@catalystneuro.com so he can add your credentials to the system.
- Now login to globus.org or follow the link in the credential notification email.
- You should see a blank interface.
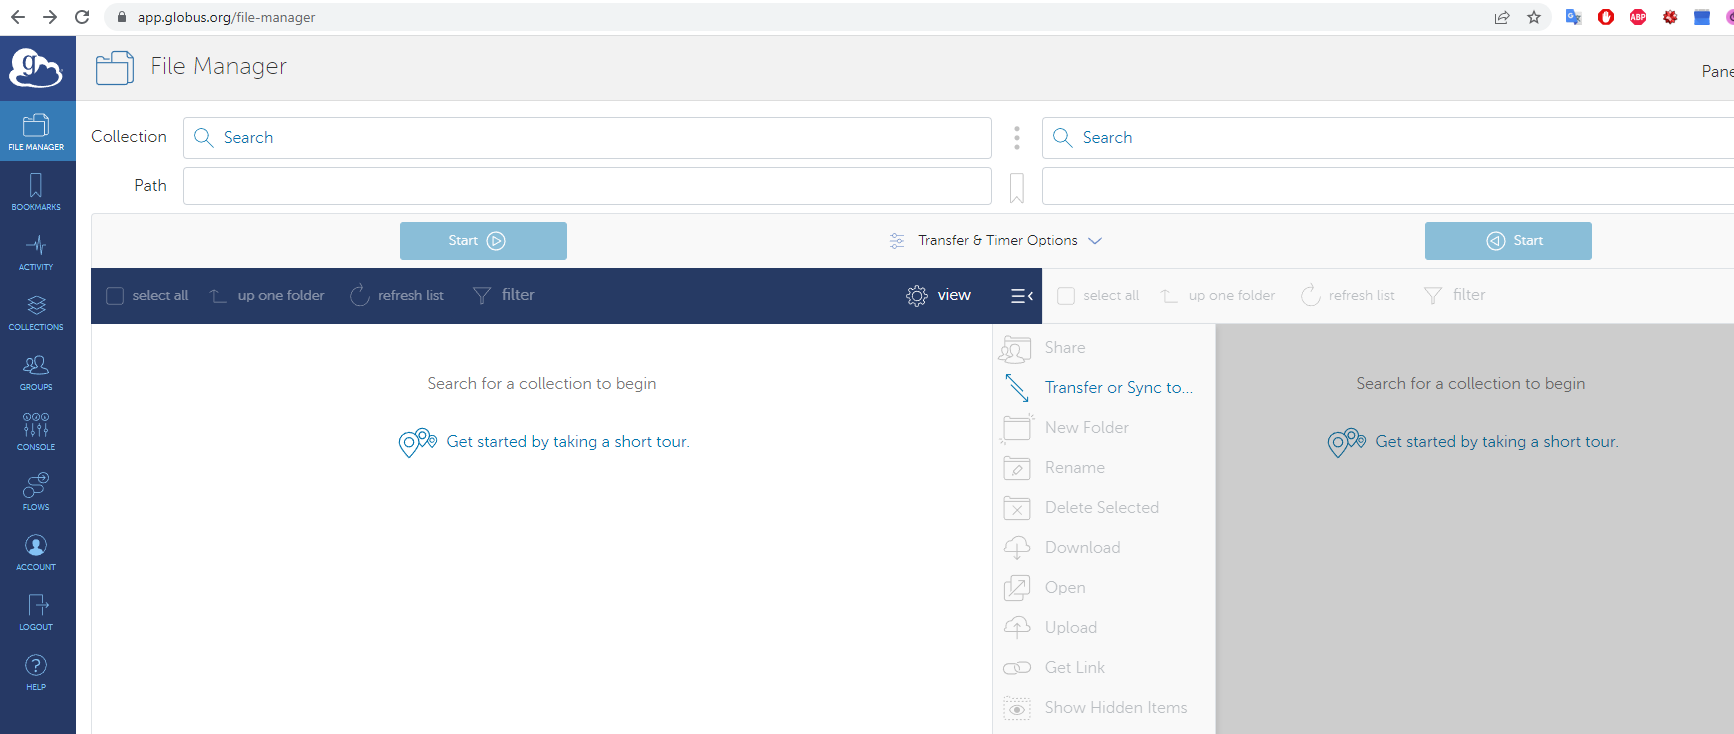
- For the first 'Collection', select 'bdichter_LBNL_drive' (this may have been automatically chosen for you if you followed the link from the credential notification). Then, navigate the 'Path' to the corresponding subdirectory we have created for your lab. Navigation can be performed by directly typing the path into the field (if known) or double-clicking the folders in the main box.
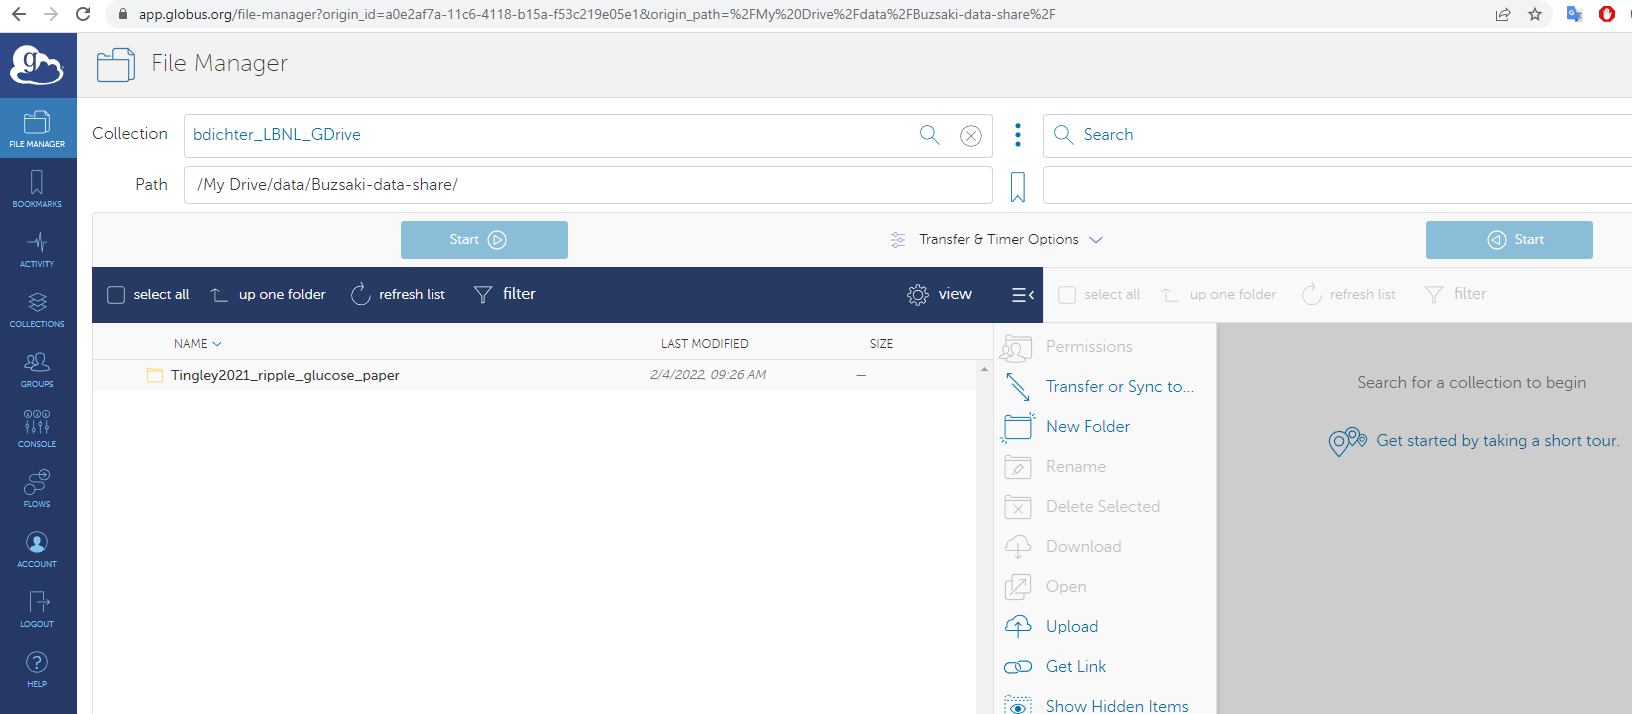
For example, I navigated to the 'buzsaki-data-share' folder.
Debugging Step 2: If the main box displays a credential error at any point during this step, try:
- Hitting the "Try Again" box below the error
- The "refresh list" icon in the box menu
- Refresh the webpage
- Try logging out of Globus and retrying from the start of Step 2
Your credentials have been added, but the system can be a bit finicky at times.
Step 3: Setup Transfer Source
Now we will do something very similar for the source data.
- If you do not see a second menu on the right half of the interface, you may have to select the "Transfer or Sync to..." button to force it to show
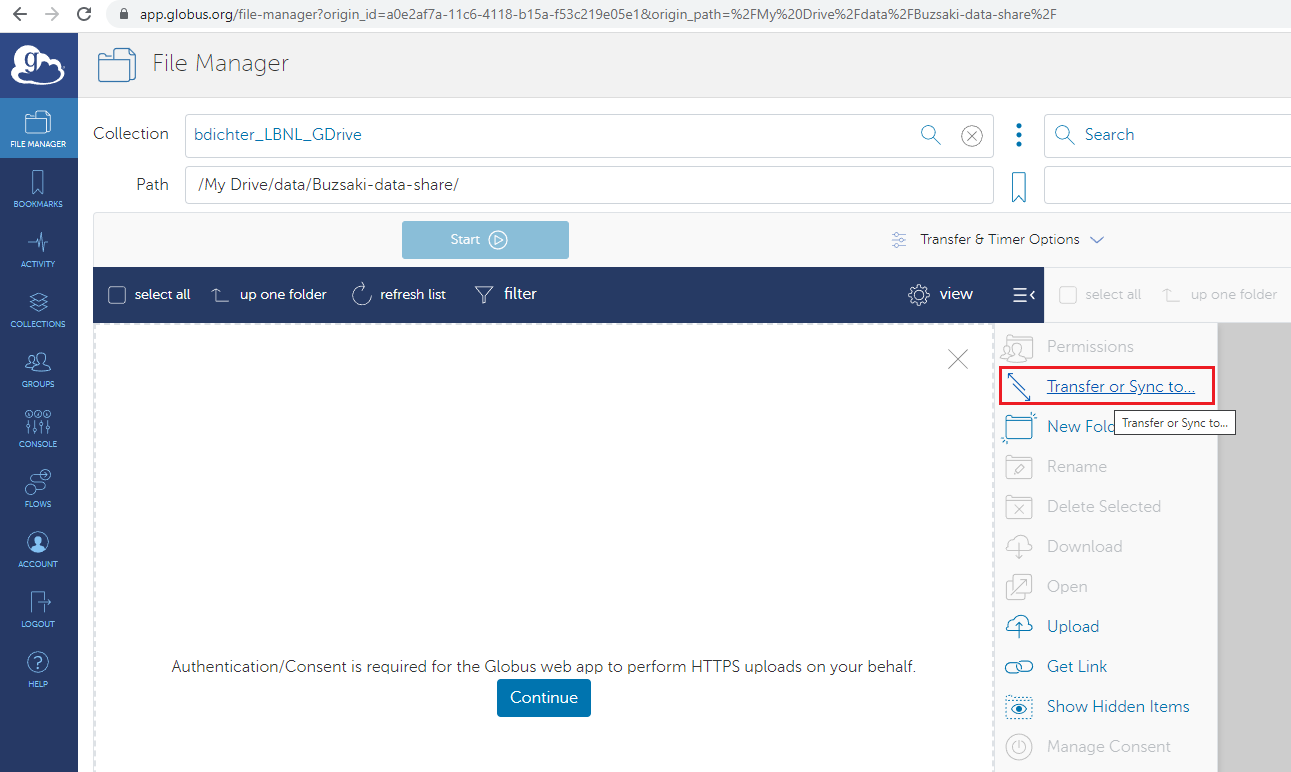 You should now see two side-by-side Collection+Path menus.

- For the second 'Collection', set this to your named endpoint that is active on the system that has access to the source data files/folders.
- Navigate to the outermost folder location of the data you wish to share, and click on the folder you wish to transfer.
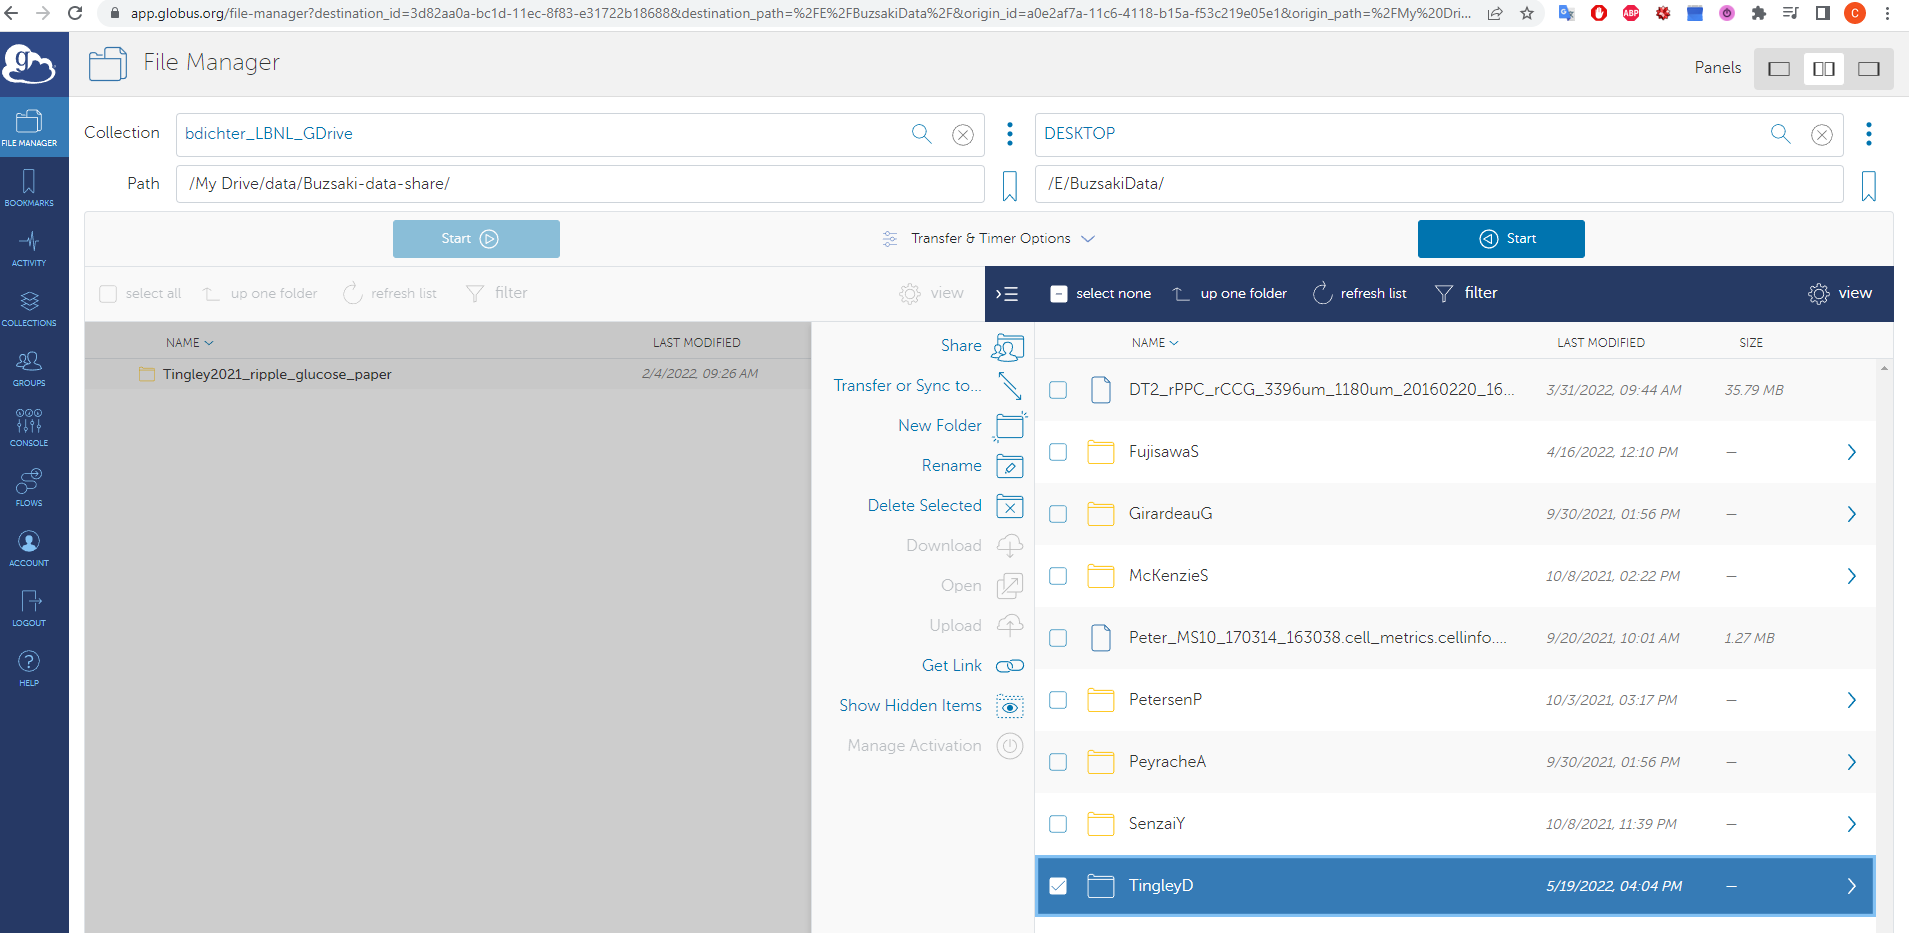 For example, I have an endpoint named 'Desktop', I navigated to the folder 'BuzsakiData', and selected the folder 'TingleyD'
 - Now press the blue 'Start' button, and the transfer should begin! You can confirm data is transferring via the 'Activity' tab from the left-most navigation bar.
⚠️ WARNING:
DO NOT press the 'Upload' button next to the cloud icon.
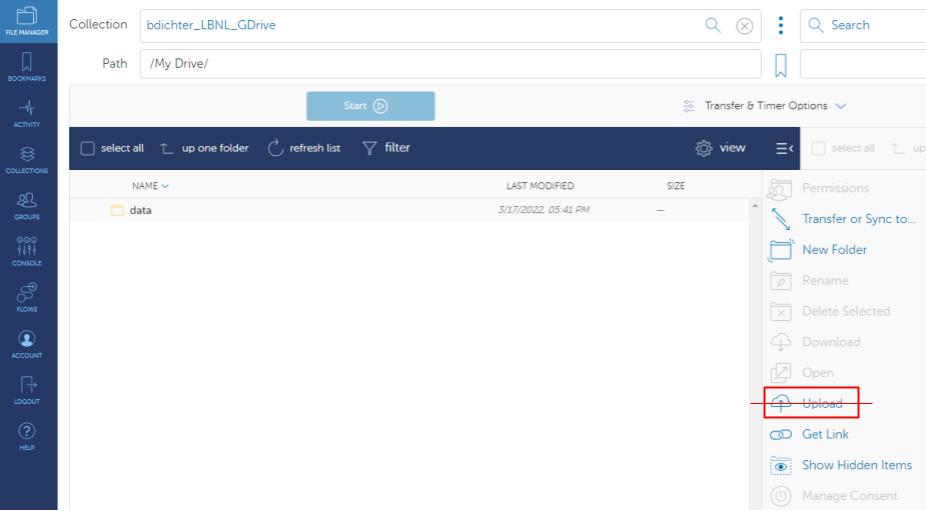 The drag-and-drop interface this utilizes is distinct from the formal transfer tool and will:
- Fail credential access
- Miss data engineering benefits for multiple or very large files
Debugging Step 3
If you noticed that your Globus endpoint, though installed and active on the correct system, is unable to navigate to the desired folders, there are two typical solutions:
For Windows/MacOS:
- Open the 'options' for the GlobusConnectPersonal app from the system toolbar

- The first window that pops up in the options ought to be 'Access'

- By default the root of the access will be wherever the app was first installed and run
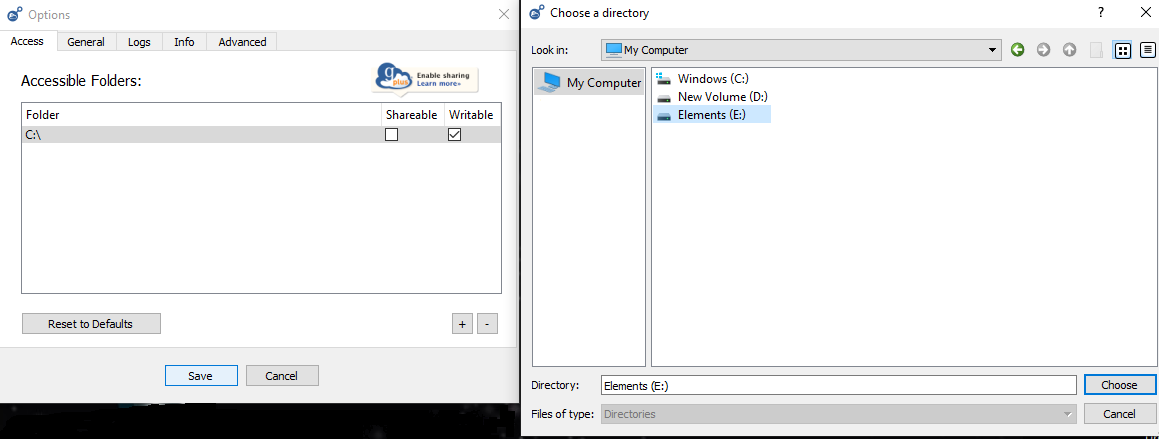
- To add a new access location, use the '+' button
- Select which drives or sub-folders you wish to grant Globus access to
- Refresh the web interface, and the new locations should appear
For Linux:
You likely launched the personal endpoint via the command line, in which case you may need to grant access to mounted volumes using the -restrict-shared-paths <path to add access to> when activating the endpoint.